在 GitHub Codespaces 中使用 Datasette
GitHub Codespaces 是 GitHub 提供的一款免费工具,它在云端提供一个完整的 Linux 开发环境,完全通过浏览器访问。
这是开始使用 Datasette 的一种非常巧妙的方式,特别是作为构建您自己的私有 Datasette 实例并开始使用它来探索和分析数据的工具。
请注意,Codespaces 设计上不是用于托管公共网站。您在 Codespace 中创建的任何 Datasette 实例都只能作为私人实例供个人使用。
本教程将展示如何在 Codespaces 环境中安装和运行 Datasette。
步骤 1:创建 Codespace
每个 Codespace 都需要关联到一个 GitHub 仓库。
您可以使用任何现有仓库,或者创建一个全新的仓库。
或者如果您不想创建自己的仓库,可以使用我的 simonw/codespaces-datasette 仓库。
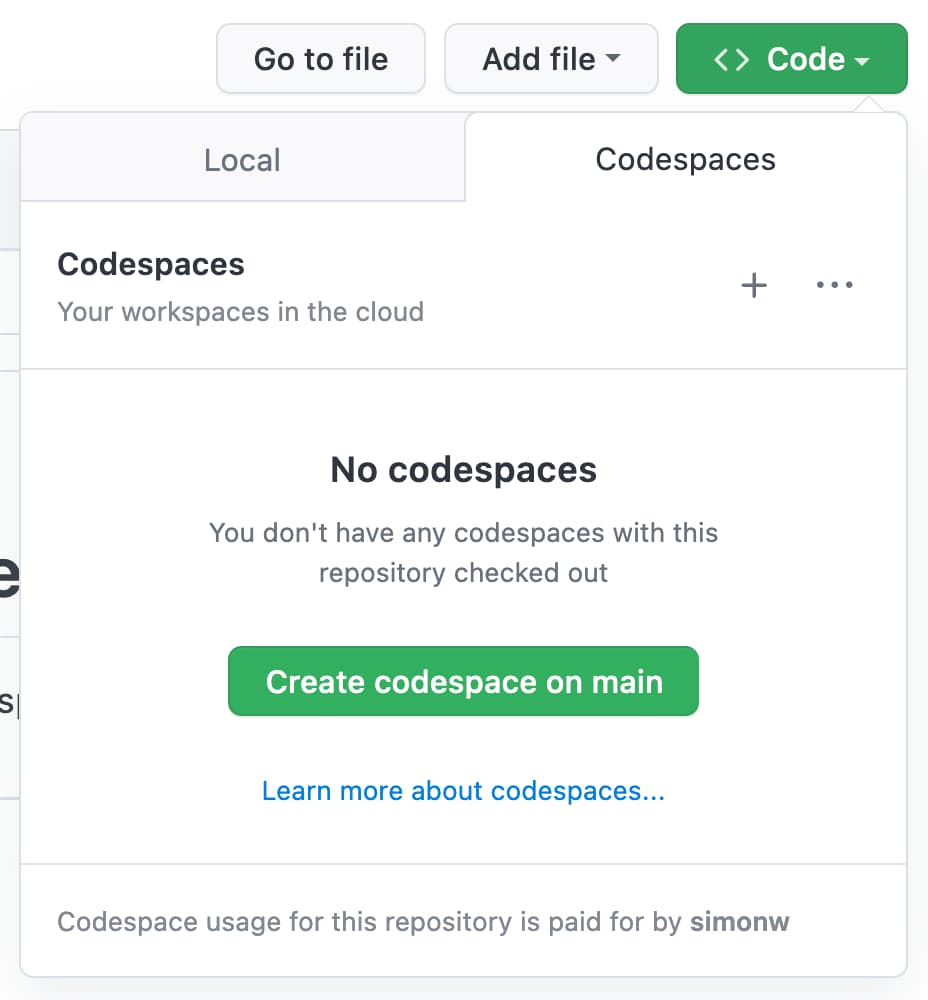
使用“Code”按钮,选择“Codespaces”选项卡,然后点击“Create codespace on main”来启动一个新的 codespace。
codespace 启动运行后稍等片刻,您应该会看到类似这样的界面
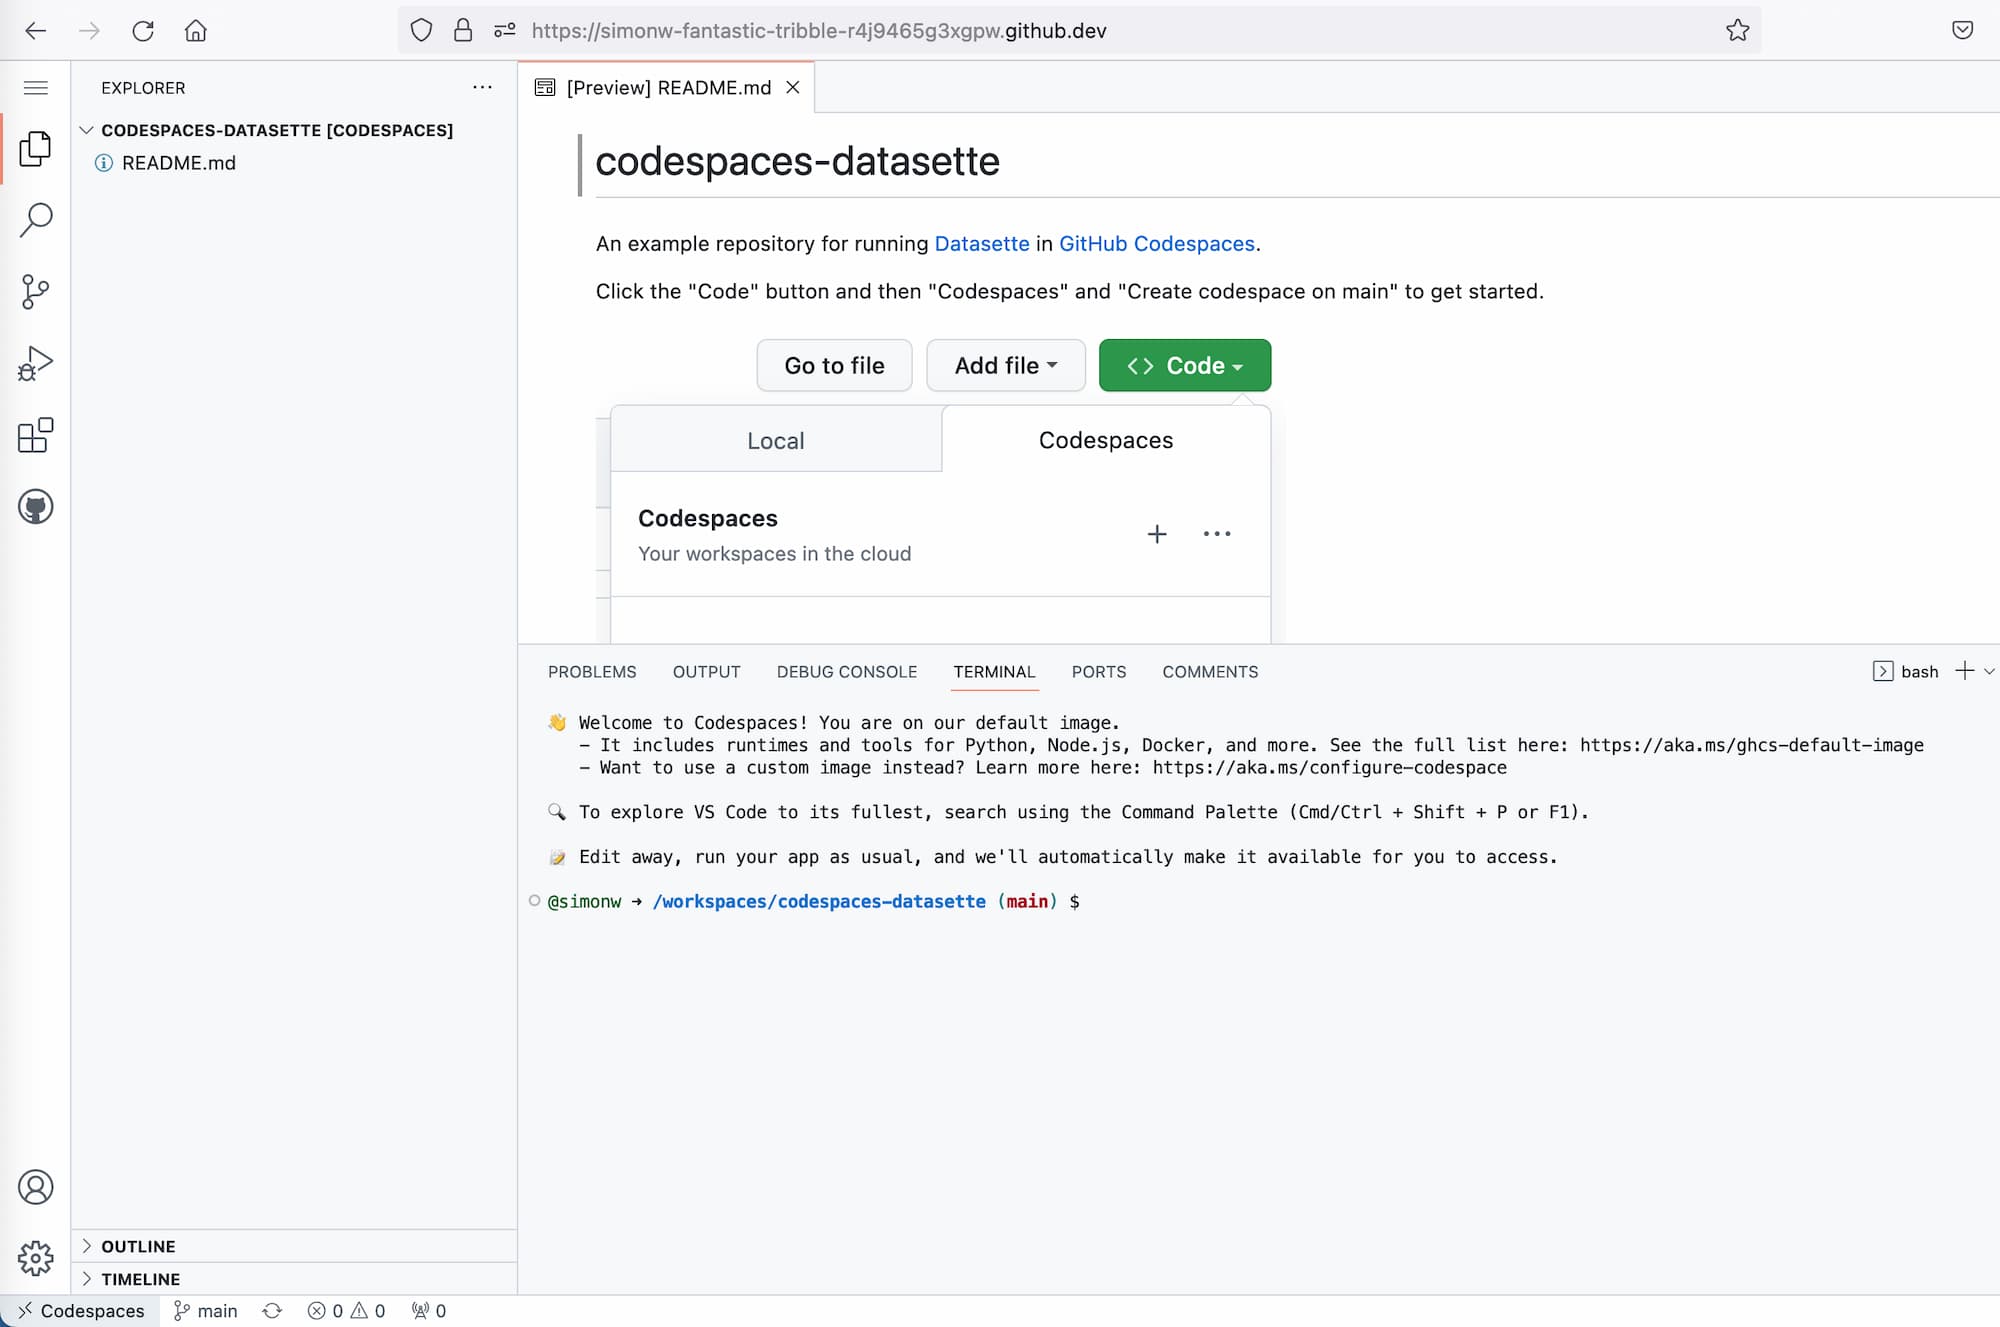
我们将完全在页面底部的终端面板中进行操作。
步骤 2:安装 Datasette
在运行 Datasette 之前,我们需要先安装它。我们可以使用以下命令进行安装
pipx install datasette
这将使用 pipx 安装 Datasette,确保它保留在自己的独立环境中,不会与您可能决定在 codespace 中运行的任何其他 Python 代码发生冲突。
要确认 Datasette 已成功安装,请运行此命令
datasette --version
我们还需要安装一个插件
datasette install datasette-codespaces
datasette-codespaces 插件对 Datasette 做了一些小的更改,使其更好地在 Codespaces 环境中运行。没有它您也可以运行 Datasette,但可能会遇到一些令人沮丧的问题,例如内部链接无法正常工作。
步骤 3:启动 Datasette
要启动 Datasette,请运行此命令
datasette data.db --create
这将启动 Datasette,并使用一个名为 data.db 的空 SQLite 数据库。如果该数据库尚不存在,将会被创建。
您应该看到以下内容

点击“Open in Browser”(在浏览器中打开)按钮,在新浏览器选项卡中打开 Datasette Web 界面。
如果您看不到该按钮,请检查 Codespaces 界面中是否提供了“Ports”(端口)选项卡。您可以使用它来连接到您的 Datasette 实例。
步骤 4:导入一些数据
您的 Datasette 界面将以一个空数据库开始。让我们向其中添加一些数据!
我们将使用 sqlite-utils 命令行工具来完成。
我们可以通过启动新的终端,让 Datasette 在后台运行。点击终端窗口顶部的“python”字样,选择“Split terminal”(拆分终端)。
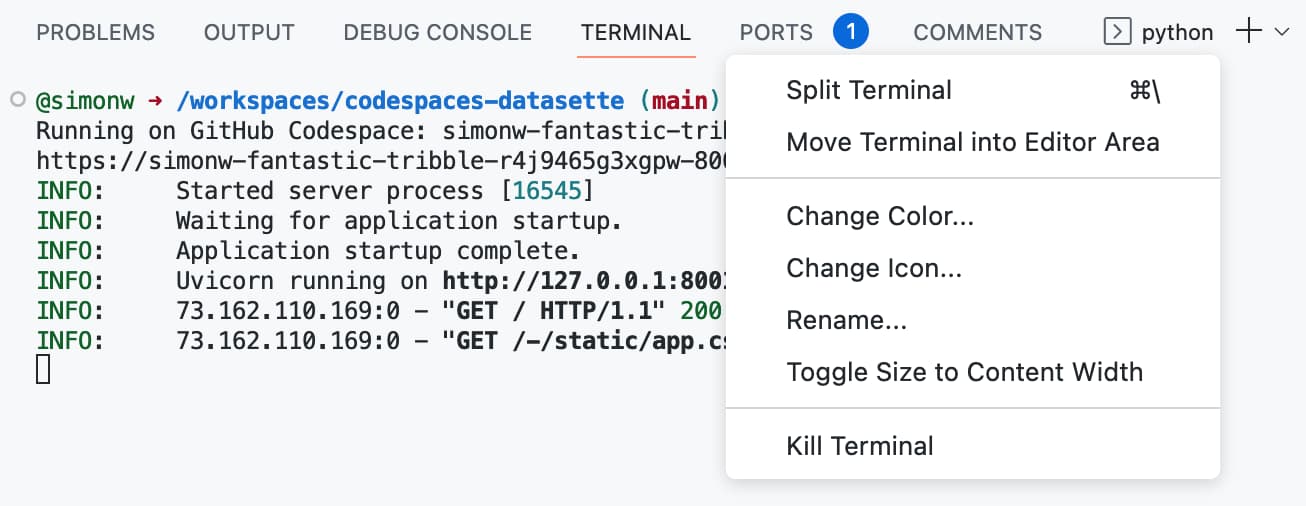
现在您应该看到两个并排的终端窗口。
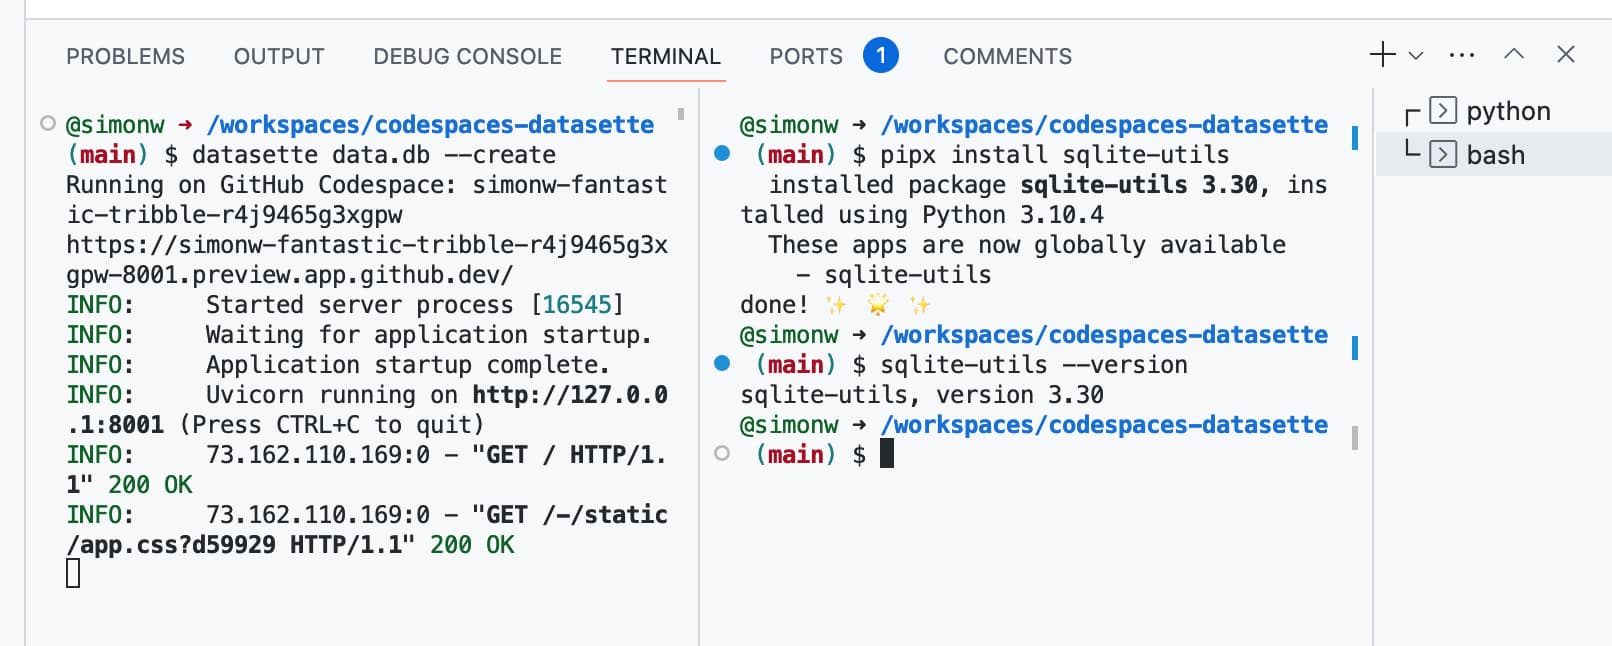
在新的终端窗口中,运行此命令安装 sqlite-utils
pipx install sqlite-utils
然后用此命令确认安装
sqlite-utils --version
让我们从网上获取一个 CSV 文件
wget https://static.simonwillison.net/static/2022/Manatee_Carcass_Recovery_Locations_in_Florida.csv
并将其插入我们的数据库
sqlite-utils insert data.db locations \
    Manatee_Carcass_Recovery_Locations_in_Florida.csv \
    --csv -d
这会创建一个名为 locations 的新表,其中包含该 CSV 文件中的数据——佛罗里达州的海牛尸体回收地点,可追溯到 1974 年。
--csv 选项告诉 sqlite-utils 将文件视为 CSV 文件,-d 选项告诉它根据数据推断列类型(而不是将所有列都视为文本列)。
有关此示例数据的更多信息,请参阅教程 使用 sqlite-utils 和 Datasette 清理数据。
步骤 5:安装更多插件
Datasette 有超过 100 个可用插件,列在插件目录中。
要安装这些插件,我们首先需要停止正在运行的 Datasette 服务器。为此,请先点击运行 Datasette 的终端窗口,然后按 Ctrl+C 停止服务器。
datasette install ... 命令用于安装新插件。让我们安装其中的几个
datasette install \
  datasette-vega \
  datasette-cluster-map \
  datasette-copyable \
  datasette-configure-fts \
  datasette-edit-schema \
  datasette-upload-csvs
以下是每个插件的功能介绍
- datasette-vega 添加折线图、柱状图和散点图可视化功能
- datasette-cluster-map 为任何包含经纬度列的表添加地图可视化功能
- datasette-copyable 提供额外的导出选项,用于从 Datasette 中复制和粘贴数据
- datasette-configure-fts 帮助您配置表的全文搜索功能
- datasette-edit-schema 提供工具来编辑表的 schema(结构)
像这样再次启动服务器:datasette data.db 我们不再需要 --create 选项,因为我们知道数据库已经存在了——不过即使包含了它也不会有问题。
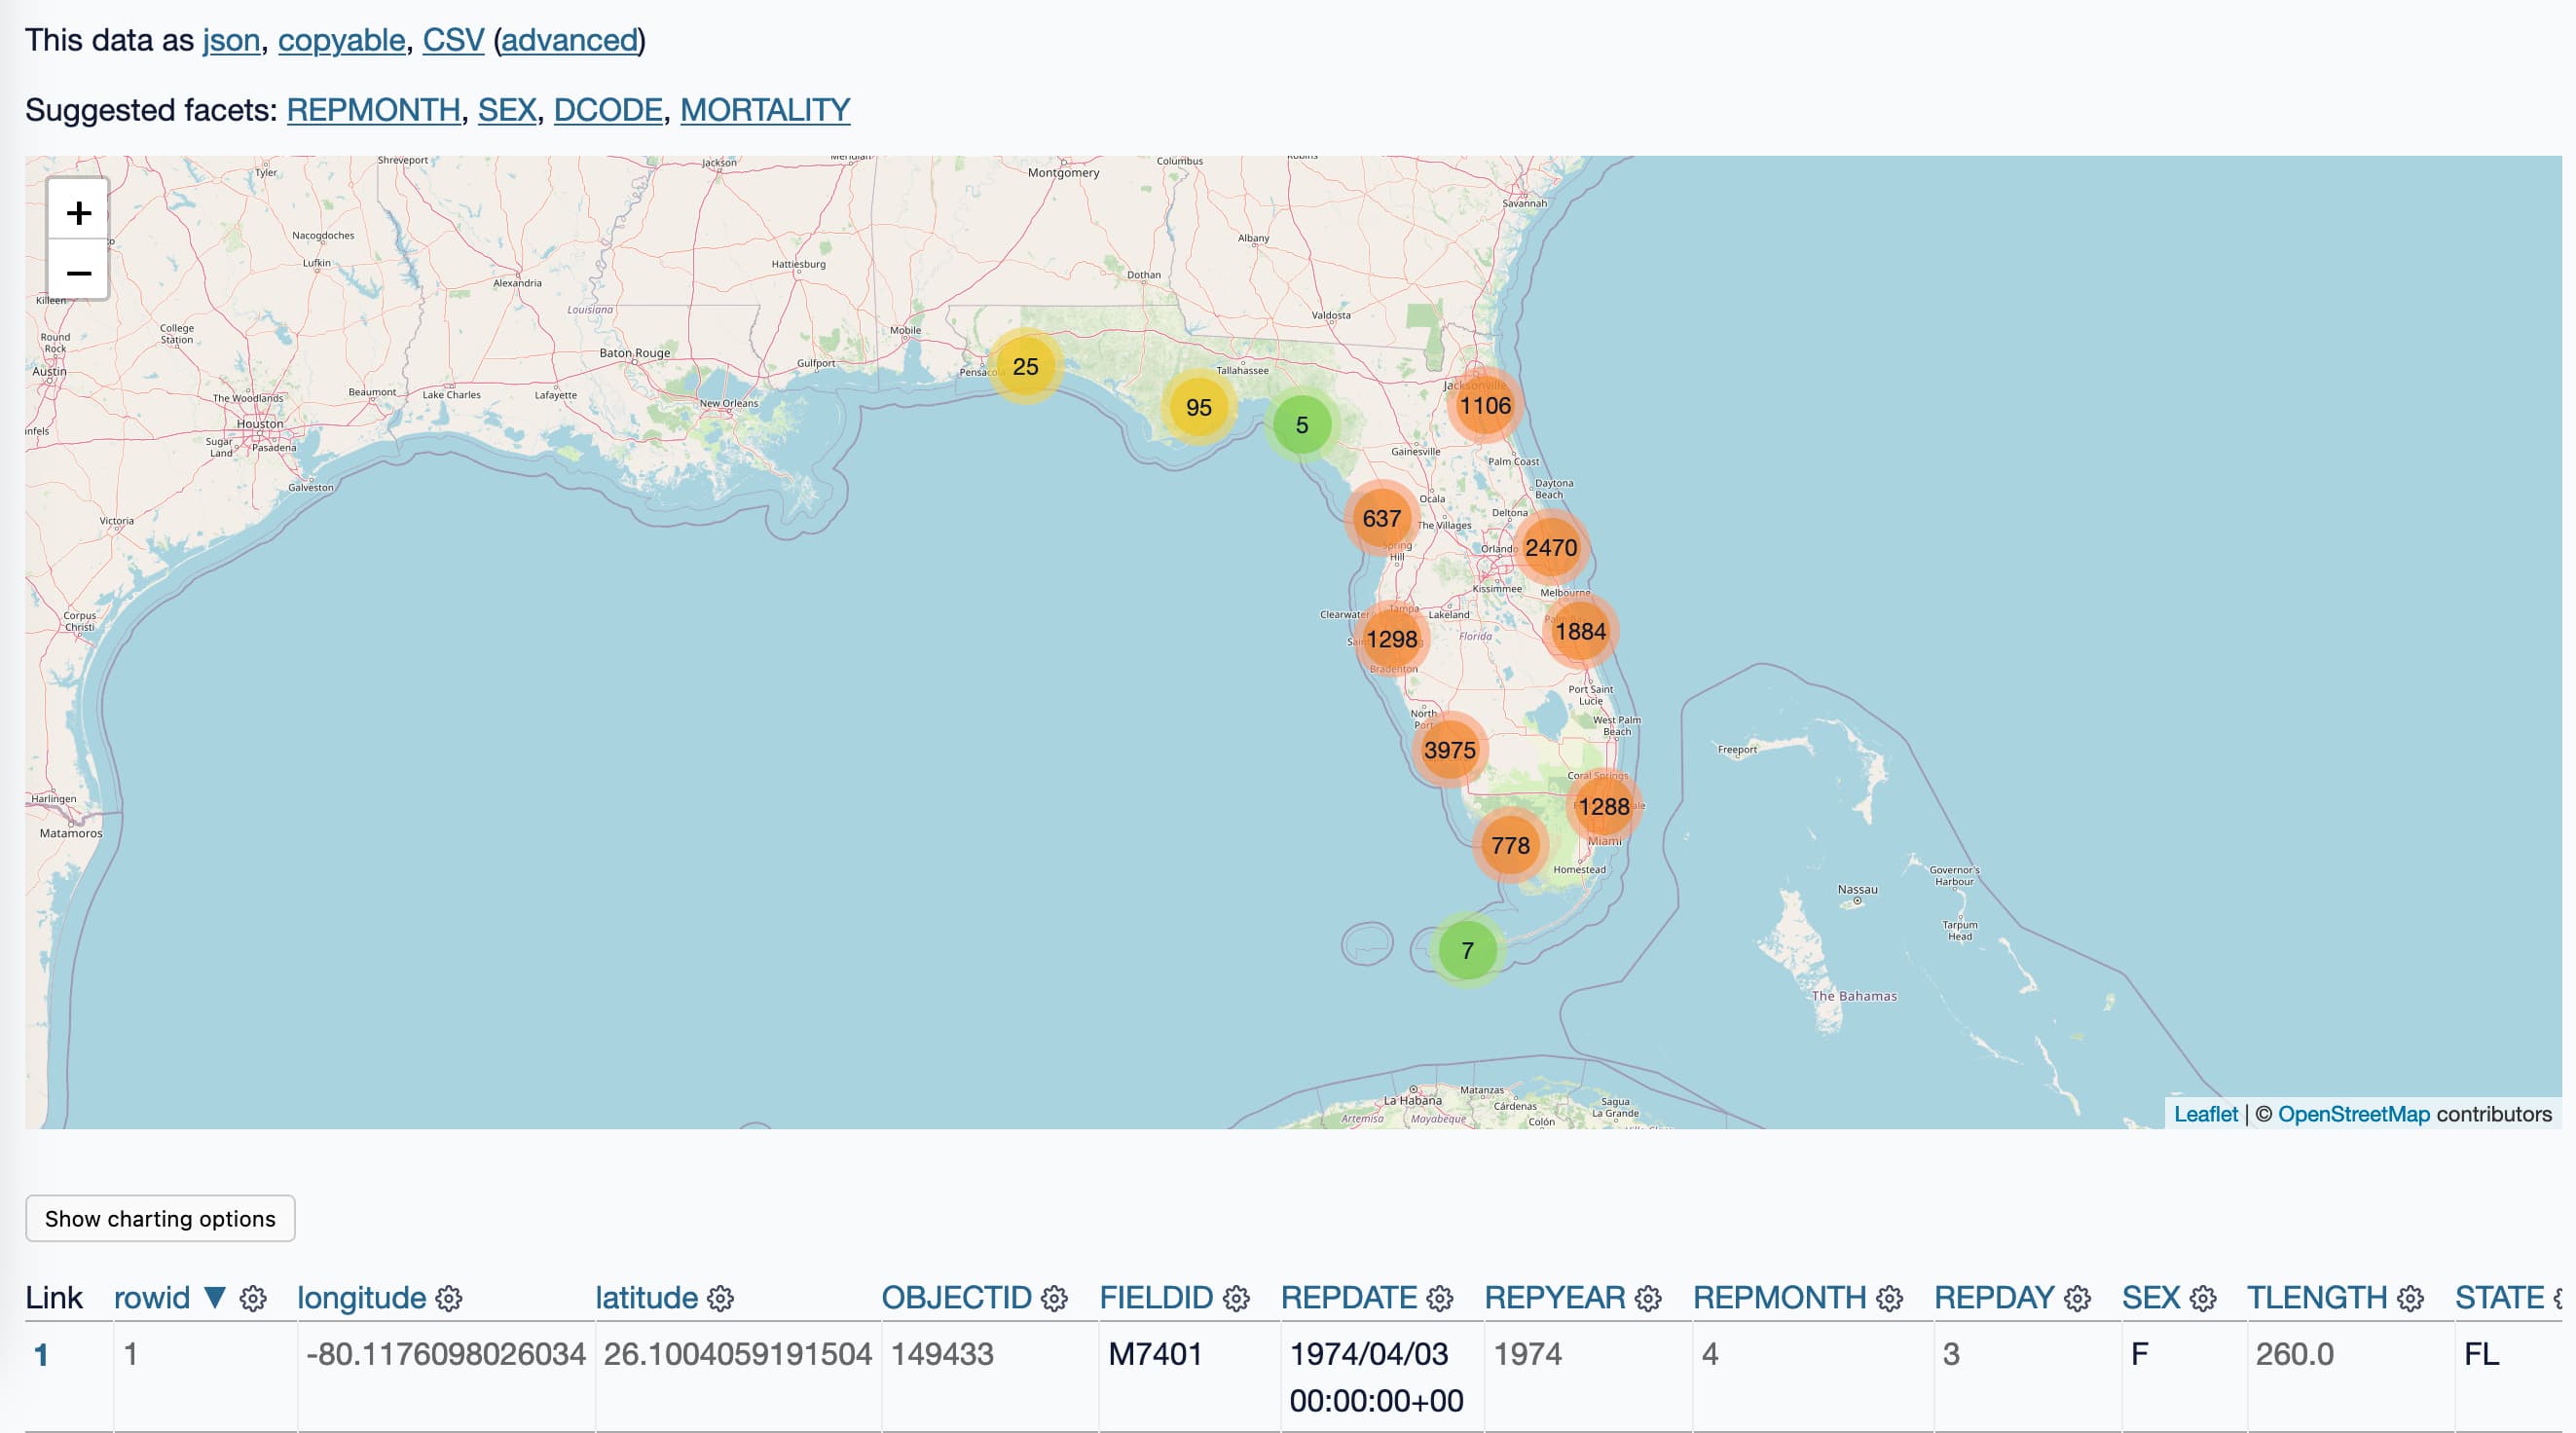
步骤 6:在地图上探索海牛地点
在 Datasette 中,导航到“locations”表。它应该有名为 X 和 Y 的列,看起来可能包含经纬度数据。
datasette-cluster-map 插件可以将这些数据全部呈现在地图上……但前提是这些列的名称必须是 latitude 和 longitude。
我们可以使用 datasette-edit-schema 插件来重命名这些列。
点击表格顶部的齿轮图标,然后选择“Edit table schema”(编辑表 schema)。
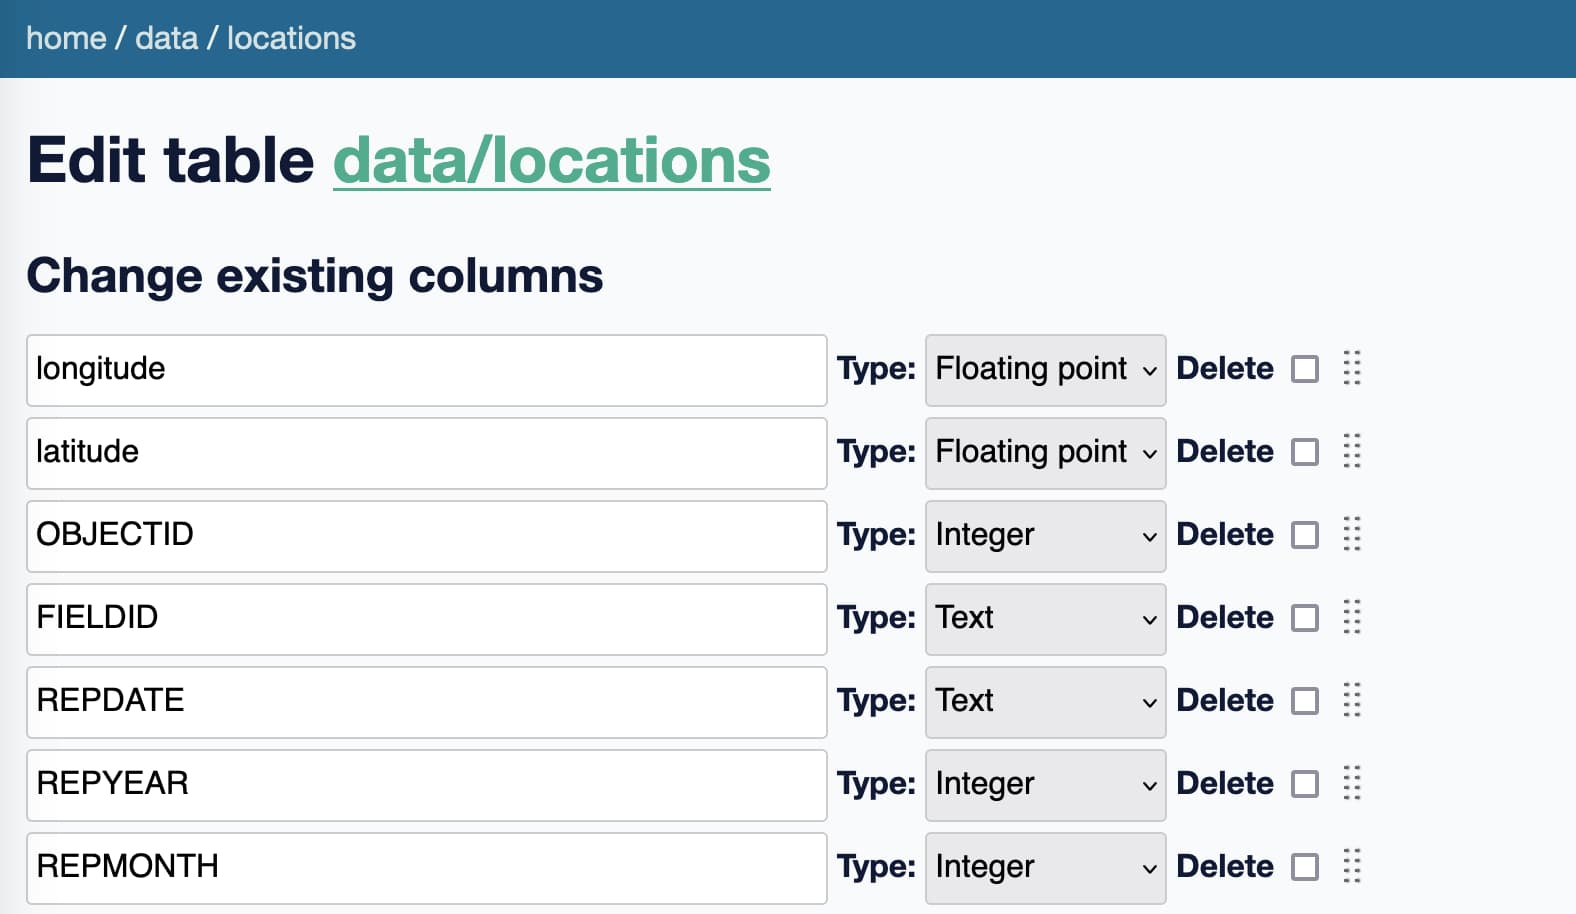
将 X 和 Y 列分别重命名为 longitude 和 latitude,然后点击“Apply changes”(应用更改)。
返回表页面,您应该会看到这张佛罗里达州地图,上面标注着海牛的地点。
下一步
尝试完成 使用 sqlite-utils 和 Datasette 清理数据 教程的其余部分,了解更多关于如何协同使用 sqlite-utils 和 Datasette 的信息。